Add or Edit an Extended Attribute
Extended attributes are used to define a subset of attributes to hold data. They are directly linked to an attribute and so can only be created after an initial attribute.
To add or edit an extended attribute:
-
Select the section that you want to add the extended attribute to from the Select section drop-down list.

Note: If you opened the Attribute Manager by clicking the Manage Attribute Definitions option in the Tasks panel, this field is read-only.
-
Do one of the following:
-
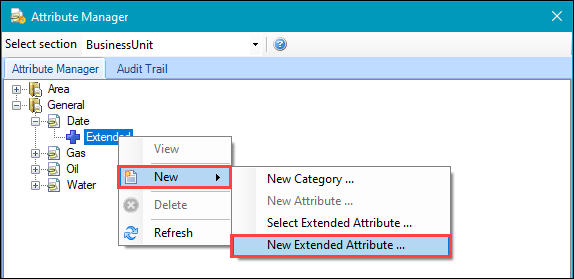
Right-click on the relevant Extended item in an attribute and then select New > New Extended Attribute to add a new attribute.
-
Right-click on an existing attribute and click the View option to edit it.
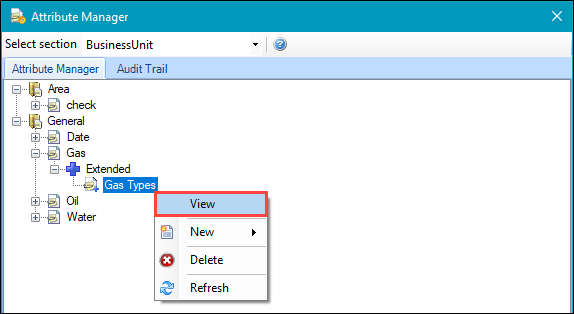
The Attribute Definition window is displayed.
Note: You can also add a pre-existing attribute by right-clicking on the relevant category and then selecting New > Select Extended Attribute. This displays the Select window where you can select the relevant extended attribute.
-
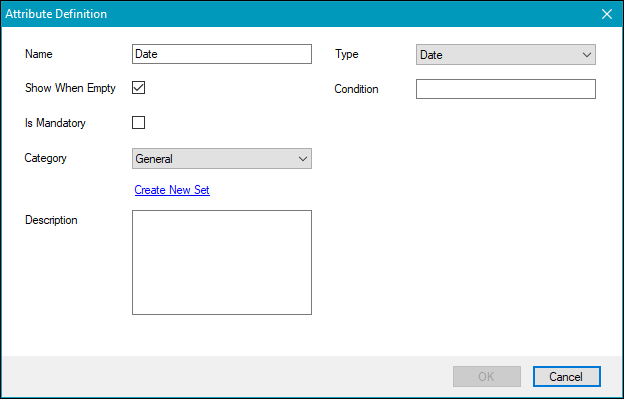
- Enter or edit the relevant details. The fields displayed are dependent on the Type field.
The fields common to all extended attribute types are described in the following table.
| This field | Holds this information... |
|---|---|
| Name | The name of the extended attribute. |
| Show When Empty | Whether to display the extended attribute if there are no values. |
| Is Mandatory | Whether the field is mandatory. |
| Parent Attribute | The attribute to which the extended attribute belongs. Select from the drop-down list. |
| Description | A description of the extended attribute. This is displayed at the bottom of the Attribute Manager when the extended attribute is selected. |
| Type |
The field's data type. Select from the following:
|
| Condition | A condition that enables or disables the extended attribute depending on another attribute's value (for example: entering a condition of [<extended attribute name>]>9 only enables the extended attribute if that attribute is greater than 9). |
Additional fields depending on the Type are defined in the following drop-downs:
The additional fields for Decimal or Number types are described in the following table.
| This field | Holds this information... |
|---|---|
| Common Mask | This forces the particular formatting of data entry into a field. Currently, there is only one option for both the Decimal and Number types - DefaultDecimal (that is: a decimalised number) and DefaultNumber (that is: a whole number) respectively. |
| Mask Example | Displays an example of the common mask selected. This cannot be edited. |
| Formula | Allows you to define a formula to calculate a value based on other attributes (for example: [Attribute1]*[Attribute2] will multiply the Attribute1 and Attribute2 fields and display a value). |
| Default Value | A default value, if required. |
Selecting the 'Entity' type displays the Type Name field, which at present only contains the 'Contact' option.
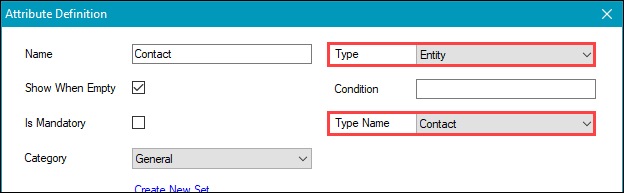
This allows the user to select a contact record.
Selecting the 'List' type displays the List section.
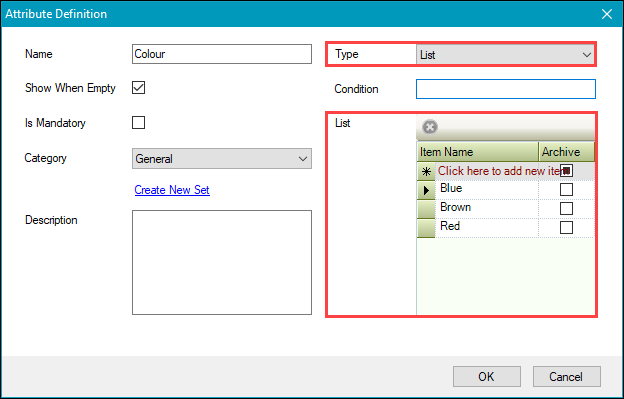
This allows you to add defined options for the user to select from a drop-down list.
Selecting the 'ReferenceData' type displays the Type Name field, where you can select from available reference data items to display.
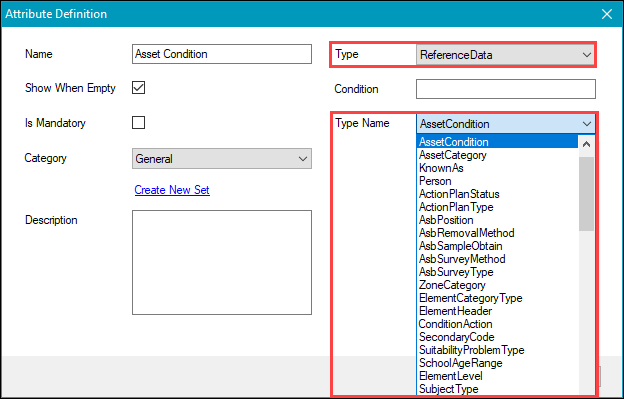
Refer to Reference Data for information on defining reference data items.
The additional fields for Text types are described in the following table.
| This field | Holds this information... |
|---|---|
| Common Mask | This forces the particular formatting of data entry into a field. Select whether the field requires an email or website format, or is a free text field. |
| Mask Example | Displays an example of the common mask selected. This cannot be edited. |
| Default Value | A default value, if required. |
Note: There are no additional fields for Date, True\False or Yes\No types.
-
Click OK.
The extended attribute is then added to the attribute.
It can be accessed by users in the relevant editor by clicking the purple plus button adjacent to its parent attribute field.
